Monday, December 6, 2010

Peanut Brittle- the EASIEST


Do you like peanut brittle? Do you need a "quickie" for your Christmas celebrations. Here's a great, simple, quick recipe for you- alot better and alot cheaper than the boughten stuff. I just whipped up some for my folks to send for their Christmas and thought you might like the recipe... BTW- it's a microwave recipe.

Peanut Brittle

1 c. peanuts
1 c. sugar
1/2 c. light corn syrup
1 t. baking soda
1 t. vanilla
1 t. butter

In 1 1/2 qt. casserole, stir together peanuts, sugar, and syrup. Cook 5 min. 30 seconds on high, stirring well after 4 min. Add butter and vanilla. Cook 1 min. longer. Add baking soda, and quickly stir until light and foamy. Immediately (and I do mean immediately) pour onto a lightly buttered baking sheet. Spread out thinly. When cool, break into pieces.

This hardens quickly, so don't "loiter" over pouring it out and spreading it.


I finished the great blue a few days ago, just haven't gotten him posted. Busy with the Christmas rush, wrapping, last minute shopping, etc. Now to get him framed. This fellow really posed for me when we were out in the boat in La.

Thursday, December 2, 2010

Carving, Painting, and Christmas Fun

Today was finally spent in the studio again after and absence of over a week due to holiday travel and decorating. The pelican has been sealed and now gessoed. I've begun to work on his legs.


I also spent quite awhile painting on the great blue as well. He is shaping up. Still more to do, but he should be complete with another day or so in the studio if I have enough time, altho with working on the pelican at the same time it slows me down.


It's holiday time again and lest you think I've been slacking off, here is what I've been up to, along with a Thanksgiving trip to visit my aunt in Iowa. I rarely get to spend a holiday with her so we had a lovely time.

I love the tree, but my favorite is my Krinkle Klaus's and my Christmas village, which takes me 2 days to put up. I could leave it up all year if only I didn't have to dust it! It makes me feel soooo nostalgic for the old time Christmas magic.

This is my entire village. I'll post close-ups of parts of it and some of my "special" personal pieces. I don't have one of those expensive sets, I have bought pieces from a number of sets from inexpensive places like K-Mart and JoAnn Fabric over the years. I buy what I like or what is special to my family.


I used to teach yearly at a woodcarving seminar in War Eagel, Arkansas and it was run by a family named "Sutton". So when I found an arts/crafts gallery and the "Sutton" name I had to have it!


Ofcourse I have to have a pet store- gotta buy more chihuahuas!


I used to live in the town of Jordan (note the name on the drugstore), my family owned a Hardware Hank store there (I made it from a candle shop- renamed it and added the Hank face).


My husband is a retired firefighter- gotta have a station and a firetruck!


And my favorite- a woodworkers/woodcarvers shop!

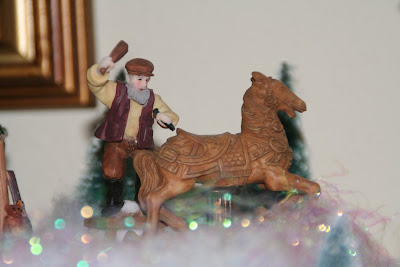
I even found a carver and a fellow sharpening his tools!


I hope you are enjoying the holiday season as much as I do. It goes so quickly, only to be followed by - brrrrr..... cold weather. :-(

Friday, November 19, 2010


While I seal the pelican carving I started a new painting. Here's a WIP photo from last night and today. I'm hoping to get this finished before next Tues. with the holiday coming up. I know that's going to cut into painting time. This is as usual, a miniature, done in acrylic. The reference was taken on our recent trip to Louisiana when we were out boating with friends. This fellow was one of the few who stayed put as we passed. We decided he was a "ham" and was posing for the camera. ;-)

Wednesday, November 17, 2010

Carving "stuff"

I'm finally getting back to post here about my carving equipment. I have been at this for a multitude of years so I have "accumulated" quite a bit, but I've used it all for years now. I love my power carvers and I also have a very special place in my heart for my dustbox as my father made it especially for me a number of years ago. I wouldn't want to be without it now.


These are a few of my favorite knives, which is how I started out for a number of years. The one in front with the silver band was my original knife. I used it "to death". The band is a wire wrap to hold it together. A friend of mine "saved" it for me after the handle split. I continued to use it for quite awhile after that. Then I got my very FAVORITE knife, the one right behind it, at a carving club auction. I still love that knife and never found another I liked as well. The small detail knife I used for special things as well as the larger, longer knife which a friend made for me. I rarely use a knife now, but now and again I fall back to them for some special reason or other.


These are my power tools. I started out doing power with only the Foredom (this is a flexible shaft tool), even my tiny detail work. Finally my hand would start "going to sleep" from the vibration. At that point I figured I had enough time into it to know I wasn't going to quit anytime soon, so I splurged and bought my NSK. That is the little box power tool on the right. The motor is in the hand piece and there is little or no vibration when using it. I still rough out with my Foredom, then do the detail work with the NSK. I had a different Foredom initially, and "drooled" over one like this- it reverses. I was lucky enough to win this one as a prize one year when I won a first place/Best of Show. I was one very happy carver that year!

Next comes my dustbox. It is a large "piece of furniture" as you can see. The bottom opens to allow for cleaning out the dust and periodically changing the filter.


Below is my wood burner, another lucky prize for another BOS. Again, I had a different burner, same maker (Colwood), but I "coveted" one with 2 units. I can have two different tips and flip back and forth. I have another burner I also won, a different brand, which is supposed to be really good, but I prefer my Colwood and never use the other one. I really should sell it!


Finally- here is the pelican WIP. I actually have him all carved and feathered. He's in process of being sealed now. I thought you might like to see the pattern I started with. When making the pattern for a carving you have to be able to visualize not only a side view, but also a top view. Then you have to draw it out and make it fit together for the sawing process. Also as I carve I have to figure out dimensions and when making a miniature I have to "miniature-ize" things. This means every dimension so you have to think in terms of 3-D. I end up doing ALOT of math- which I am NOT good at!!! Gives my mind a workout! Hope you find this all interesting and not boring!


Monday, November 8, 2010

Latest on mini WIP carving

Worked on it yesterday and today (around the piano lessons) and he's getting to not look so "naked" as a friend so delicately put it!!! Boy, those pelicans have "nasty" feathers on their backs- try to make sense out of those groups!!! It's taking me a lot of studying, and alot of "more reference, more reference" and "where WAS that other shot of that area" to get it!!! I think you can see the detail here and the lifting of the feathering...


By the way- the body from neck to tail is 1.75" in length. So that should give you an idea of how tiny the feathering is. You can also see I've undercut the one lifted wing on the top. I have more undercutting under the wings yet, but that waits until the last minute once all the rest is done.

Friday, November 5, 2010

Miniature Carving WIP

Well, quite a bit of time has been spent carving this fellow, although you may not think it looks like it! My carpal tunnel certainly does! Wrist is hurting big time from harp and carving... Yikes. My 2 loves. I can deal with the pain just as long as it doesn't make it impossible to work. The first photo here was from 2 days ago. May not look like much progress, but I put in quite a bit of time just getting that far.


Today was spent mostly working on the head area. The detail is very intricate and time consuming. I am looking forward to getting to the feathering soon I hope, altho there is still more to do on the underside and also to finish off the head and neck, plus detailing a bit on the wings. As I write this I realize I still have quite a bit left to go. Once you start to see a "face" it seems like you're getting somewhere I guess. It took me awhile to envision the bill but I finally was able to put it all together. Now if I only don't slip up when I'm sanding (I power sand)- one slip and it's all over. Bad enough on the full size pieces, these miniatures haven't a bit of error margine at all...